Activities
Activities can be logged against accounts, contacts and leads.
User permission: CRM
Activities are records you can add to an account, a contact, or a lead. There are different types of activities:
Business note (doesn't show in calendar): Non-scheduled, informational activity useful for recording any relevant information that needs to be shared, such as an email discussion.
Time-based activity (shows in calendar):
Meeting: Details about future or past meetings, such as date, time, attendees and location.
Phone log: Details about a phone call, including subject, date and duration.
Task: Internal activity to be done within a timeframe, such as ‘Send copy of the latest invoice to the customer’. Can be assigned to other users. Can have a status, such as In Progress or Complete.
Personal appointment: Special type of activity that can only be viewed by you (the person who created them). It isn't connected to the rest of CRM and only displays in your own view of the Activities and Agenda pages.


View a list of all activities
Select the CRM menu button > Activities.
The Activities screen opens by default on the List view. This is a list of all your activity records, so you can see the activity of what is going on across all your accounts, contacts and leads. In other words, you can see what needs to be done, by whom and by when.


You can also view activities directly within account and contact records, on the Activities tab.
On the Activities screen, by default, the activities are listed by date and the activity grid has the following columns:
Activity: Displays the type of activity, such as a meeting, email, phone log, task, business note, or personal appointment.
Subject: Displays the subject or description of the activity.
Parent: Displays the name of the account, contact or lead, as applicable, to which the activity relates.
Status: Is only available for meetings and tasks.
Campaign: Displays the campaign each activity is tied to.
Date: Displays the most relevant date for each activity.
Owner: Displays either the CRM user who entered the activity or the CRM user to whom the activity was assigned.
Team: The specific team the activity is allocated to.
On the Activities screen, by default, the activities are listed by date and the activity grid has the following columns:
Subject: Displays the subject of the activity, such as a task, meeting, phone log or business note.
Parent: Displays the name of the account, contact or lead, as applicable, to which the activity relates.
Status: Is only available for meetings and tasks; will be blank for business notes and phone logs (can be customized by administrators).
Campaign: Displays the campaign each activity is tied to.
Date: Displays the most relevant date for each activity.
Phone Log: The date of the phone log.
Business Note: The date the note was entered into CRM.
Meeting: The start date of the meeting.
Task: When the task is due, i.e. the end date of the task.
Owner: Displays either the CRM user who entered the activity or the CRM user to whom the activity was assigned.
On the Activities screen, all activities are listed by date. You can scroll down to view all activities.
Find an activity
On the Activities screen, you can find a particular activity using the filter and search options above the grid or by sorting the list.
Use the View filter to switch between viewing your activities as a list, by month, week, or day, or in your Agenda.
Use the Search box to search for a specific activity. This performs an is like search on all columns in the grid.
Use the Activity filter to specify the type of activity you want to view, such as a meeting, email, phone log, task, business note, or personal appointment.
Use the Parent filter to specify the account, contact, or lead, to which the activity relates.
Use the Status filter to display activities with a specific status, such as in progress, completed, cancelled, etc.
Use the Campaign filter to search for activities by the campaign they are tied to.
Use the Date filter to view activities for future or past dates, or the present (today, this week, this month). In CRM, a week starts on Sunday. By default, activities are filtered on This Week.
Use the Owner filter to display only your activities or activities that belong to another user (that you have permissions to view).
Use the Team filter to display activities allocated to a specific team to which you belong.
Select a column heading to sort data into ascending or descending order.
Filters remain active until you turn them off, so if you apply a filter and move away from the screen and then return, the filter will remain. To clear any filter you have applied, choose Select none from the dropdown list.
Learn more about filtering and searching in CRM.
On the Activities screen, you can find a particular activity using the filter and search options above the grid or by sorting the list.
Use the Date filter to view activities for future or past dates, or the present (today, this week, this month). In CRM, a week starts on Sunday. By default, activities are filtered on This Week.
Use the Type filter to view activities for a specific activity type, such as Meetings.
Use the Status filter to view activities with a specific status. Only Meetings and Tasks have a status.
Use the Campaign filter to display only those activities that are tied to a campaign.
Use the Team filter to display activities allocated to a specific team to which you belong.
Use the Owner filter to display only your activities or activities that belong to another user (that you have permissions to view).
Use the Search box to search for a specific activity by name. This performs an is like search on the name column.
Click a column heading to sort data into ascending or descending order.
More than one filter can be applied at the same time. Filters remain active until you turn them off, so if you apply a filter and move away from screen and then return, the filter will remain. To clear any filter you have applied, select All from the dropdown list.
Learn more about filtering and searching in CRM.
To find the activity you require, type your search term into the box, such as a name, company, or status and any matching results will instantly be displayed.
Switch to a calendar view
Calendar view is only available in the desktop version of CRM.
On the Activities screen, you can switch from the default List view to a calendar view (Daily, Weekly, Monthly) to get a different perspective of the activities. Calendar views show only time-based activity types (meetings, tasks and phone logs). Business notes don't appear in calendar views as they are non-scheduled, informational activities.
Select the View dropdown menu in the top left corner, then select one of the three Calendar views; Month, Week or Day.

For example, if you select the Month calendar view, the current month displays.

After you select a calendar view, CRM will remember that view for the duration of your browser session.
Activity summary and status
For each activity in the selected calendar, the following information displays:
Activity name and type, such as phone log, meeting or task.
Related account, contact or lead.
Scheduled time.
Status (see description of status color codes below).
Default
![]()
Cancelled
![]()
Completed
![]()
In Progress
![]()
Overdue
![]()
Actions
All calendar views share the following action controls:

Select an option from the View dropdown menu to switch between month, week and day, or switch to your Agenda.
Use the date picker to select a specific date, or use the arrows to go to the previous or next period of time. For example, if you are in Month view, go to the previous or next month.
Select Today to move directly to today's date within the current view.
Select whether to include weekends or not in the calendar.
Activity details
In any calendar view, select an activity to display a tooltip with information about the activity, a link to the activity's page, a link to the owning entity and a Delete button.

View and edit an activity record
On desktop: Select the activity subject from the list view or the activity summary tooltip in calendar view to view or edit the activity.
In mobile-friendly version: Select the activity to open its record, then select Edit to make changes.


Add an activity
Activities can be logged against accounts, contacts, and leads.
When added to a contact, the activity becomes a child of the associated account.
Activities can be set as part of a campaign.
For activity types, see the list at the top of this page.
The process for adding an activity (business note, phone log, task, or meeting) is the same for accounts, contacts, and leads:
Open the account, contact, or lead record.
Select the applicable activity button.
Enter the activity details.
Select Save.
Expand the sections below for more information and examples.
Business note
Add a note to a contact
Open the contact record.
Select Add activity, and choose Business note from the dropdown menu.
Enter a subject, assign it to a campaign, and provide a description.
When done, select Save.
The note displays in the following locations:
Activities page.
Activities tab on the relevant contact record.
Account record for the account that this contact belongs to. Open the account record and go the Activities tab.
Add a note from the Analytics grid
Open Analytics and filter the data to display accounts.
Locate and select the account row (it turns blue).
Select Custom actions > Actions > Add note.

Type a subject and description, and assign a campaign if required (you can leave that section blank).
Select Run.

The note displays in the list of account activities.

Phone log
Suppose a customer calls to ask about a promotional offer you shared last month. You can record the call as an activity against their account.
Open the account record the contact is tied to.
Select Add activity, and choose Phone log from the dropdown menu.
Enter the call details (such as duration and description of what was discussed) and select Save.

Meeting

Suppose you have scheduled an account review with a customer, and now you want to set up this meeting.
Open the account record.
Select Add activity, and choose Meeting from the dropdown menu.
Meeting tab
On the meeting tab, you can enter details about the meeting.
For internal use:
Account: This is set automatically to the account you opened and cannot be changed.
Campaign: The corresponding campaign, if applicable. In this example, the meeting is a follow-up from a campaign that ran in Spring.
Status: This field must be manually populated. It will not automatically switch to Completed when the meeting is finished. The options in the Status list can be edited by administrators using the CRM Picklists feature.
Details shared with attendees:
Subject: Required, as the subject appears in the activity list.
Owner: The default setting assigns the meeting to you.
Location: Where the meeting is taking place. In this example, the meeting is at 3.D. Joinery's main office.
Start and End: The start date and time, and the end date and time, for the meeting. In this example, the meeting is scheduled for 21 December, from 3pm to 5pm.
Description: Optional, although it is useful to enter a brief description of what occurred.
When all the necessary details are filled out, select Save. This action saves the details of the meeting, then opens two new tabs: Attendees and Attachments.
Attendees tab
Go to the Attendees tab and select Add attendees. A panel slides out from the right. There are two options:
Attendees: Select the blue plus icon in the search box to choose from existing contacts. You can also type keywords to search. Note that the activity will only appear in their agenda if it meets their CRM restrictions.
Add new: Add people not yet in CRM by entering their name and email.
Export meeting
The Export meeting option is only available in the desktop version of CRM.
If the Microsoft 365 Outlook calendar integration is active, meetings created in CRM sync automatically with your calendar, so you can skip this step.
Select Export meeting to add the meeting to your default calendar and invite attendees.
The meeting details are downloaded in a standard .ics file.
Open the file to display the meeting in your calendar, where you can invite attendees using your calendar’s usual options.
This is the only way attendees are notified of the meeting.
Attachments tab
Add attachments, if required, via the Attachments tab. In this example no attachments are added.
Click Save. A message displays at the top of the screen to indicate the meeting has been successfully saved.
CRM users can now view this meeting in three places:
On the Activities screen.
On the Activities tab on the account record.
In their own calendars, if the Export meeting button was used, or the Microsoft 365 Outlook calendar integration is active.
Task
Suppose you want to add a task to a specific lead.
Open the lead record.
Select Add activity and choose Task.
Enter the required details:
Subject, Owner, and Start and End time and date (mandatory)
Optional: Campaign, Status, and Description.
(Optional) On the Attachments tab, upload any relevant files.
Select Save.
The task will appear on:
The Activities page.
The Activities tab of the lead record.
The Activities tab of the related account record.
Attachments
You can attach relevant information to activities, such as agendas, business documents, quotations, and so on. This information can be downloaded by anyone who has access to the activity. The maximum attachment size is 10MB.
In the activity setup, select the Attachments tab.
Select Add attachment.

Select a file, type a name and select Upload.

The attachment displays in the list on the Attachments tab.

Expand the sections below for more information and examples.
Business note
Add a note to a contact
Open the contact record.
Click the Business Note button in the top right corner.
Type the note and click Save.
The note displays in the following locations:
Activities screen.
Activities tab on the relevant contact record.
Account record for the account that this contact belongs to. Open the account record and go the Activities tab. Select Include child activities filter option to display any notes against contacts for the account.

Add a note from the Analytics grid
Open Analytics and filter the data to display accounts.
Locate and select the account row (it turns blue).
Click Custom actions > Actions > Add note.

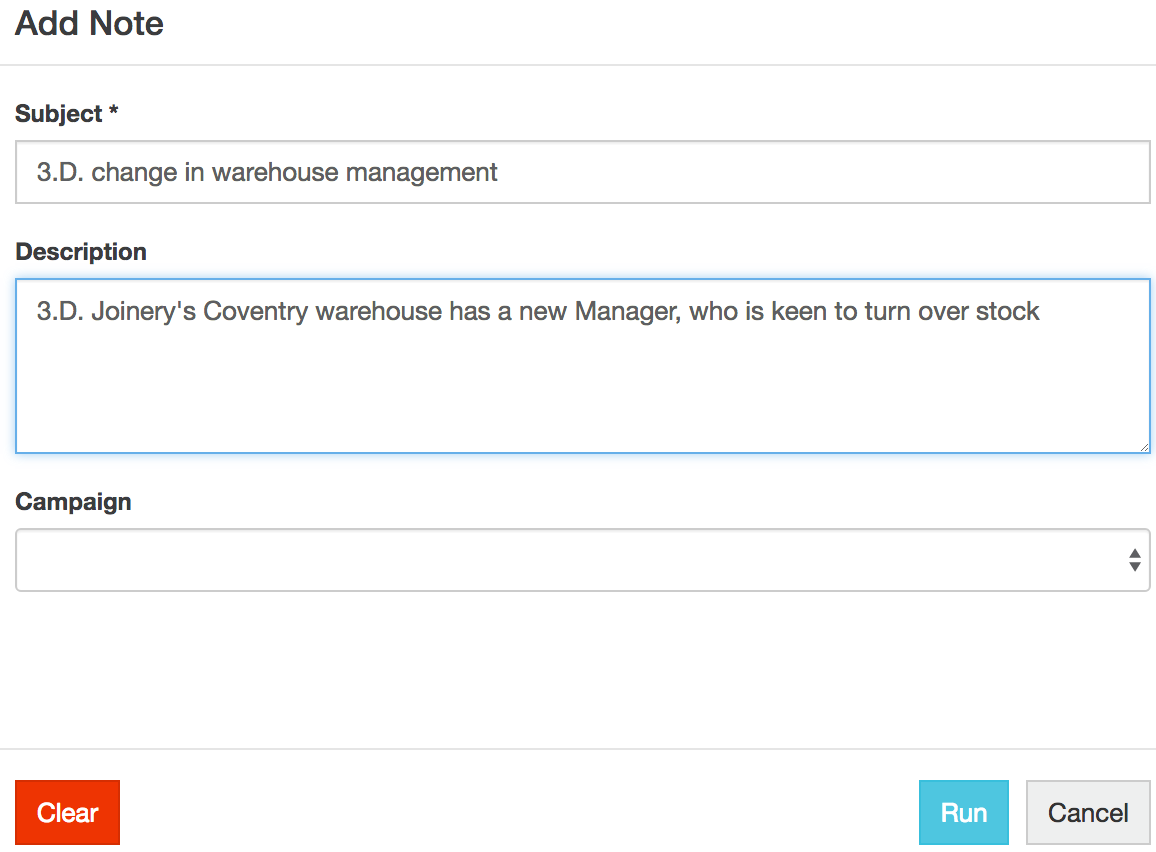
Type a subject and description, and assign a campaign if required (you can leave that section blank).
Click Run.
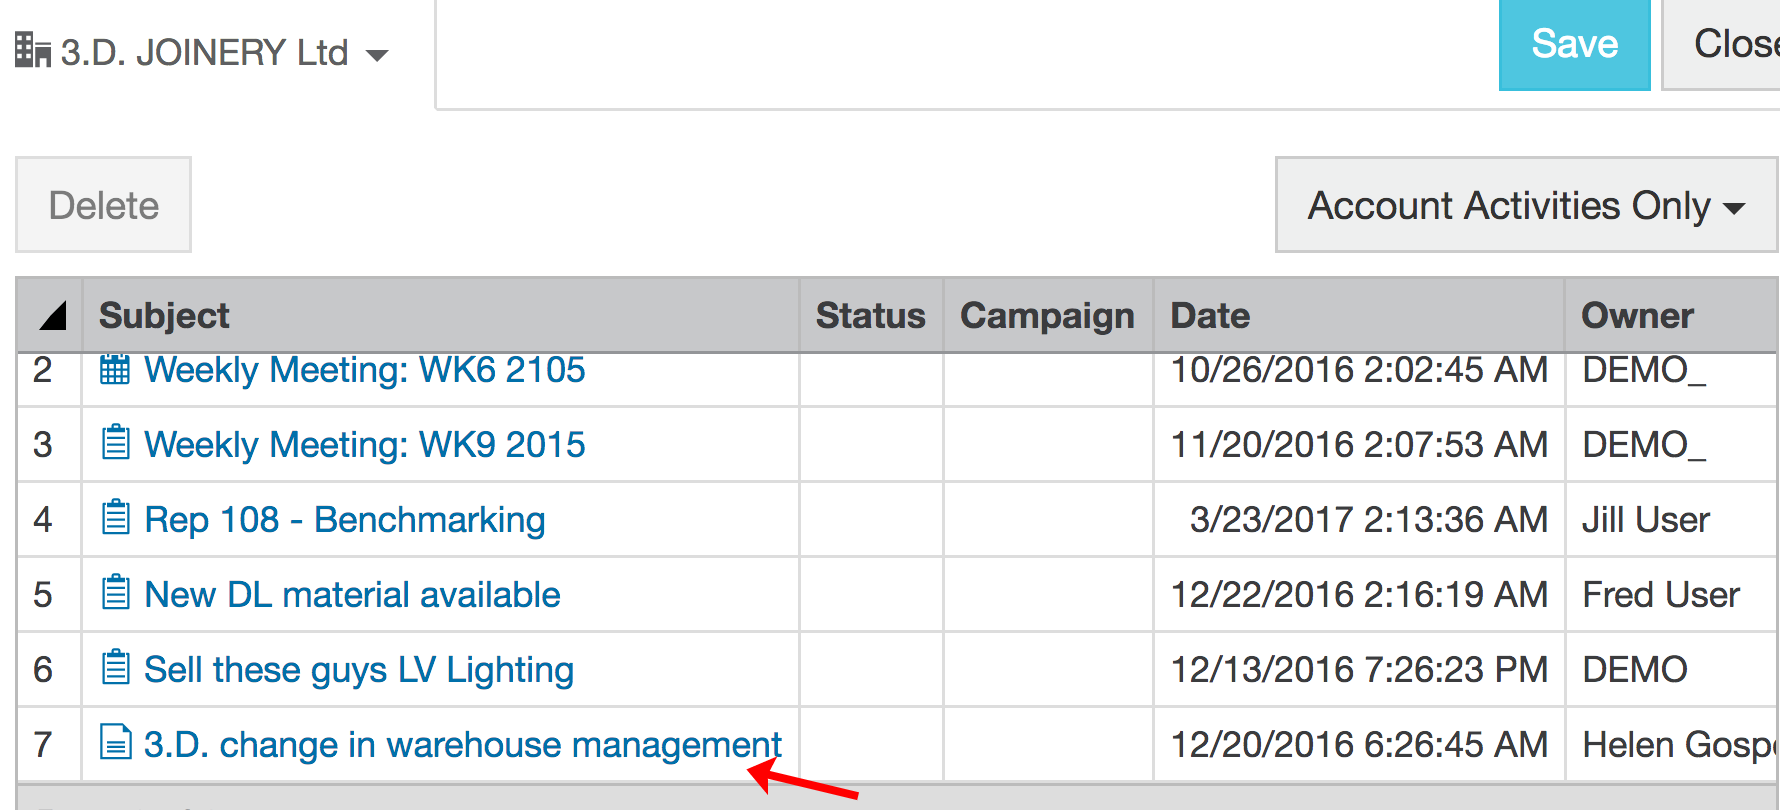
The note displays in the list of account activities.
Phone log
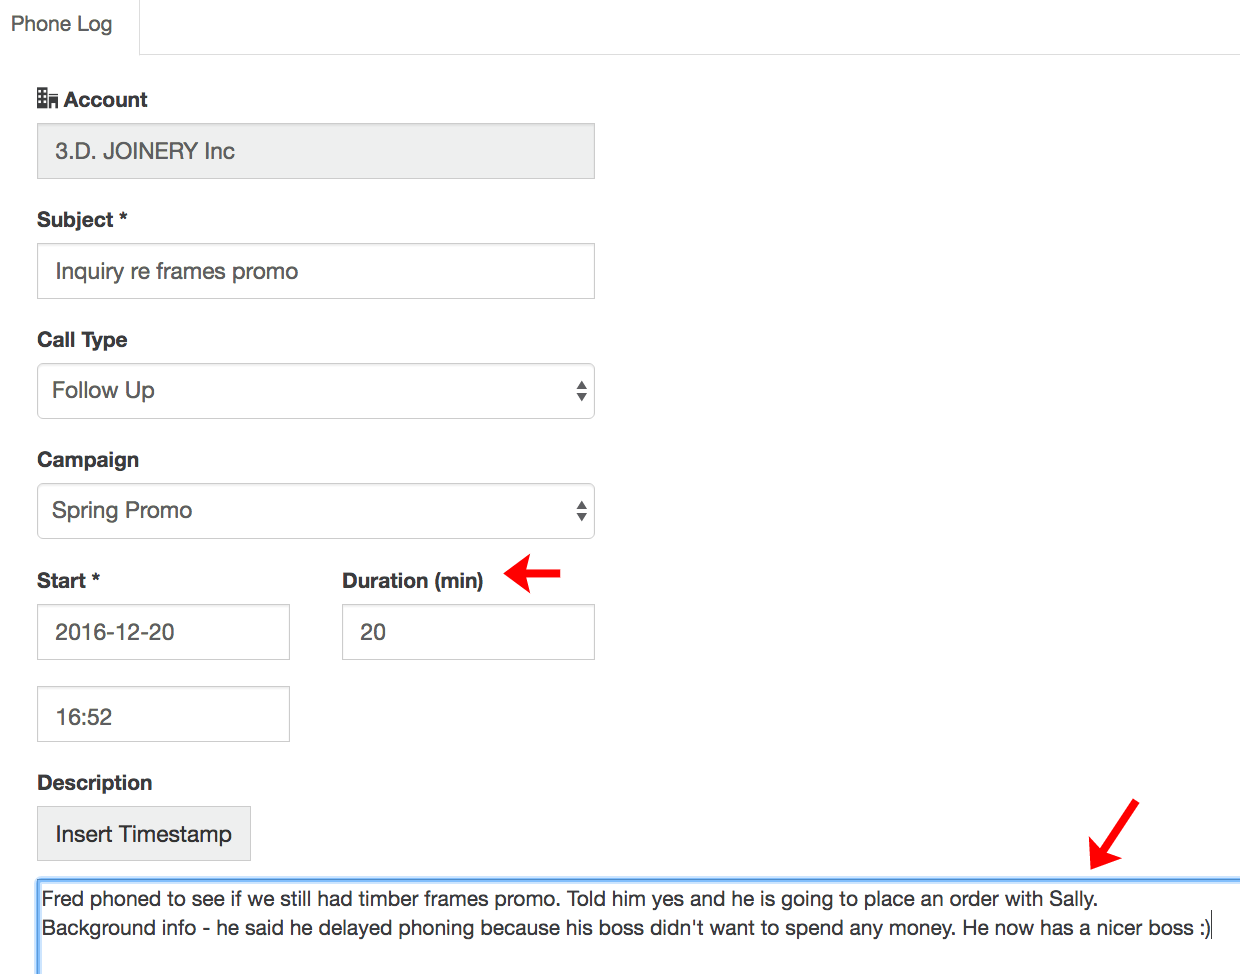
Suppose a customer calls you to inquire about a promotional offer you contacted them about last month. The phone call came from Fred at 3.D. Joinery Inc. You want to record this call against their account.
Open the account record (3.D. Joinery Inc).
Click the Phone Log button in the top right corner.
Enter the call details (such as duration and description of what was discussed) and click Save.
Meeting for an account
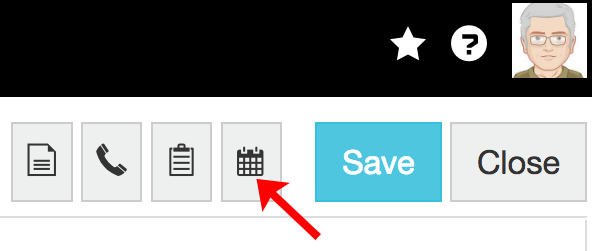
Suppose you have scheduled an account review with your customer, 3.D. Joinery, and now you want to set up this meeting.
Open the account record (3.D. Joinery Inc).
Click the Meeting button in the top right corner.
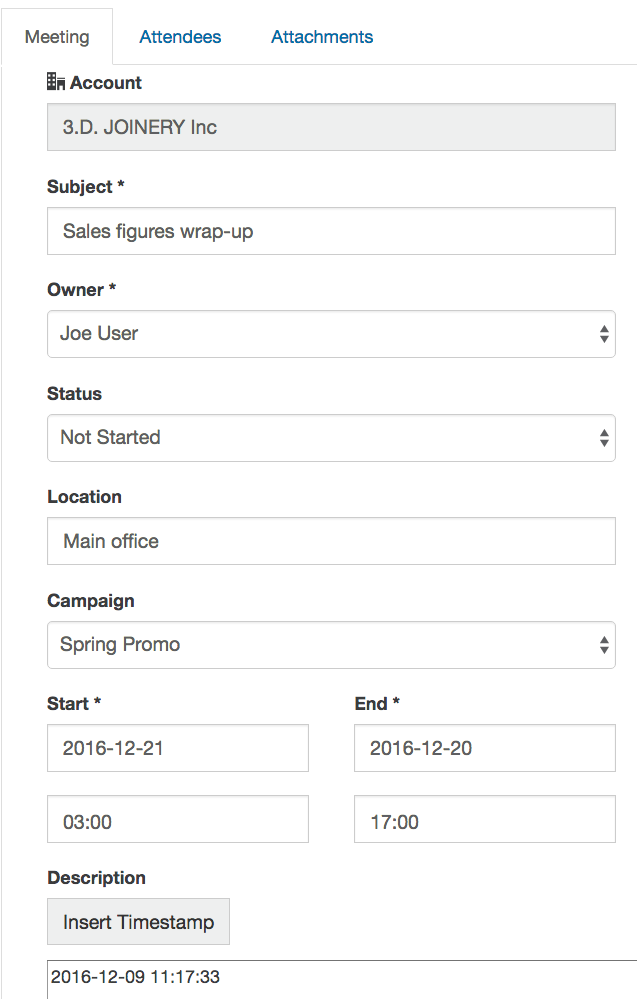
Enter the meeting details:
Subject: Required, as the subject appears in the activity list.
Description: Optional, although it is useful to enter a brief description of what occurred.
Start and End: The start date and time, and the end date and time, for the meeting. In this example, the meeting is scheduled for 21 December, from 3pm to 5pm.
Status: In this example, the status is left blank. This field must be manually populated. It will not automatically switch to Completed when the meeting is finished. The options in the Status list can be edited by administrators using the CRM Picklists feature.
Owner: The default setting assigns the meeting to you.
Campaign: The corresponding campaign, if applicable. In this example, the meeting is a follow-up from a campaign that ran in Spring.
Location: Where the meeting is taking place. In this example, the meeting is at 3.D. Joinery's main office.
Click Save. This action saves the basic details of the meeting, then opens two new tabs: Attendees and Attachments.
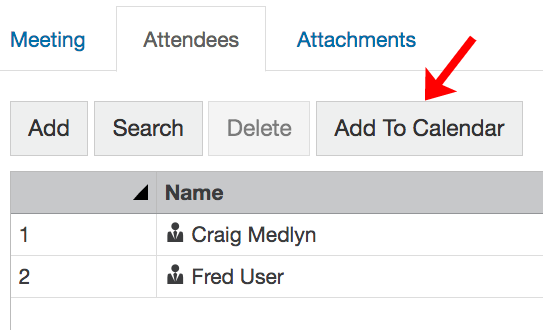
Click the Attendees tab and enter those who will participate in the meeting. There are two options:
Add: Add additional people who do not already exist in CRM. A name and email address is required. In the example below, Bill Smith does not exist in CRM, so you 'add' him. Note that the activity will only appear in their agenda if it meets their CRM restrictions.
Search: Search all existing contacts (and accounts) within CRM, and select the correct one. Justin and Daisy already exist in CRM, so you included them. You can also search for other CRM users to add as attendees.
Add the meeting to your default calendar (such as Microsoft Outlook) and invite attendees:
This action transfers the meeting information using the standard .ics format.
Different browsers handle this download slightly differently but the basic process is to click the Add To Calendar button, open the resulting ICS file, then save it.
The meeting displays in your default calendar, giving you the option of inviting attendees using the typical calendar options. This is the only way to notify attendees of the meeting.
Add attachments, if required, via the Attachments tab. In this example no attachments are added.
Click Save. A message displays at the top of the screen to indicate the note has been successfully saved.
CRM users can now view this meeting in three places:
On the Activities screen.
On the Activities tab on the account record.
In their own calendars, if the Add to calendar button was used.

Attachments
You can attach relevant information to activities, such as agendas, business documents, quotations, and so on. This information can be downloaded by anyone who has access to the activity. The maximum attachment size is 10MB.
In the activity setup, click the Attachments tab.
Click Upload.
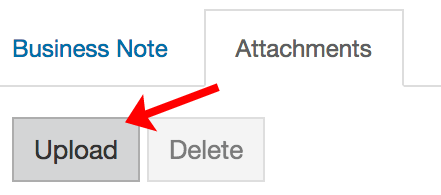
Select a file, type a name and click Upload.
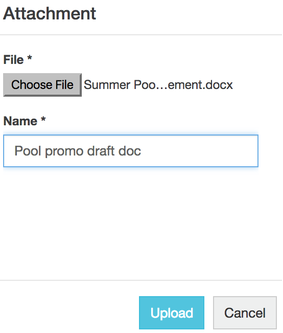
The attachment displays in the list on the Attachments tab.

On the Activities screen, all activities are listed by date. You can scroll down to view all activities.
Expand the sections below for more information and examples.
Business note
Add a note to a contact
Open the contact record.
Select Add activity, and choose Business note from the dropdown menu.
Enter a Subject (mandatory). You can then choose assign it to a campaign, and provide a description.
When done, select Save.
The note displays in the following locations:
Activities page.
Activities tab on the relevant contact record.
Phone log
Suppose a customer calls to ask about a promotional offer you shared last month. You can record the call as an activity against their account.
Open the account record the contact is tied to.
Select Add activity, and choose Phone log from the dropdown menu.
Enter the call details (such as duration and description of what was discussed) and select Save.
Meeting
Suppose you have scheduled an account review with a customer, and now you want to set up this meeting.
Open the account record.
Select Add activity, and choose Meeting from the dropdown menu.
Meeting tab
On the meeting tab, you can enter details about the meeting.
For internal use:
Account: This is set automatically to the account you opened and cannot be changed.
Campaign: The corresponding campaign, if applicable. In this example, the meeting is a follow-up from a campaign that ran in Spring.
Status: This field must be manually populated. It will not automatically switch to Completed when the meeting is finished. The options in the Status list can be edited by administrators using the CRM Picklists feature.
Details shared with attendees:
Subject: Required, as the subject appears in the activity list.
Owner: The default setting assigns the meeting to you.
Location: Where the meeting is taking place. In this example, the meeting is at 3.D. Joinery's main office.
Start and End: The start date and time, and the end date and time, for the meeting. In this example, the meeting is scheduled for 21 December, from 3pm to 5pm.
Description: Optional, although it is useful to enter a brief description of what occurred.
When all the necessary details are filled out, select Save. This action saves the details of the meeting, then opens two new tabs: Attendees and Attachments.
Attendees tab
Go to the Attendees tab and select Add attendee. A menu will pop up with two options of adding attendees:
Attendees: Select the blue plus icon in the search box to choose from existing contacts. You can also type keywords to search. Note that the activity will only appear in their agenda if it meets their CRM restrictions.
Add new: Add people not yet in CRM by entering their name and email.
Attachments tab
Add attachments, if required, via the Attachments tab.
When done, select Save. A message displays at the top of the screen to indicate the meeting has been successfully saved.
CRM users can now view this meeting in three places:
On the Activities screen.
On the Activities tab on the account record.
In their own calendars, if the Microsoft 365 Outlook calendar integration is active.
Task
Suppose you want to add a task to a specific lead.
Open the lead record.
Select Add activity → Task.
Enter the required details:
Subject, Owner, Start and End date/time (mandatory)
Optional: Campaign, Status, Description
Select Save.
Add attachments, if required, via the Attachments tab.
The task will display on:
The Activities page
The Activities tab of the lead record
The Activities tab of the related account record
Attachments
You can attach relevant information to activities, such as agendas, business documents, quotations, and so on. This information can be downloaded by anyone who has access to the activity. The maximum attachment size is 10MB.
In the activity setup, select the Attachments tab.
Select Add attachment.
Select a file, type a name and select Upload.
The attachment displays in the list on the Attachments tab.
Add a personal appointment
Personal appointments are private and only visible to you. They aren’t linked to the rest of Phocas CRM and appear only on your Activities and Agenda pages.
Open either the Activities or My Agenda screens. Select the Add activity button (the blue plus), and choose Personal Appointment.


From here, it follows the same steps as adding a meeting.
Delete an activity
Activities can only be deleted in the desktop version of CRM.
If you do not have delete permissions, the Delete option might not display or you might see a message at the top of the screen indicating you do not have permission to delete. Talk to your administrator about your permissions. Deleted items can be restored by administrators.
You can delete activities in two ways:
On the Activities page (List view), select the menu button (three dots) at the end of the activity's row, then choose Delete.

In any calendar view, click the activity to display a tooltip with information about the activity, then click the Delete button.

Last updated
