> For the complete documentation index, see [llms.txt](https://docs.phocassoftware.com/llms.txt). Markdown versions of documentation pages are available by appending `.md` to page URLs; this page is available as [Markdown](https://docs.phocassoftware.com/basics/other-tools/upload-a-file.md).
# Upload a file
Add data to your Phocas site using the file upload feature.
{% hint style="info" %}
* User permissions:
* Non-administrators: Databases and File Upload > Allow File Upload
* Administrators: Administration > Databases and Sync
* Note there are some [technical limitations](/other-information/technical-limitations.md) to adding data to Phocas.
{% endhint %}
{% hint style="success" %}
* Watch this PUG Training video: [Loading new data sets](https://www.phocassoftware.com/customer/training-series/technical#session2) (07:28 to 11:24)
* This method of adding data to Phocas doesn't require administrator privileges. However, if you are an administrator, you might prefer this method instead of using [Designer](/administration/designer.md) or [Sync](/administration/sync.md), as it's easier. This method also allows you to [automatically join or split items](/administration/sync/automatically-join-items.md).
{% endhint %}
You can add data using CSV, XLSX, and other file types. You can either add it as a new file to Phocas or replace (overwrite) a file that's already been added to Phocas. If you choose to share the file, it'll be available to your administrator as a source for database design.
### Prepare the file
Before you upload a file, check that the data is in a simple, unformatted format so Phocas can interpret the values correctly. This is particularly important for CSV files.
* **Use raw numeric values:** Remove formatting such as currency symbols. For example, use `1250.00` rather than `$1,250.00`.
* **Use a minus sign for negative values:** Use `-1250` rather than `(1250)`. Values in brackets might not be recognized as negative numbers.
* **Include a header row:** We strongly recommend including column headings in your file.
### Upload the file
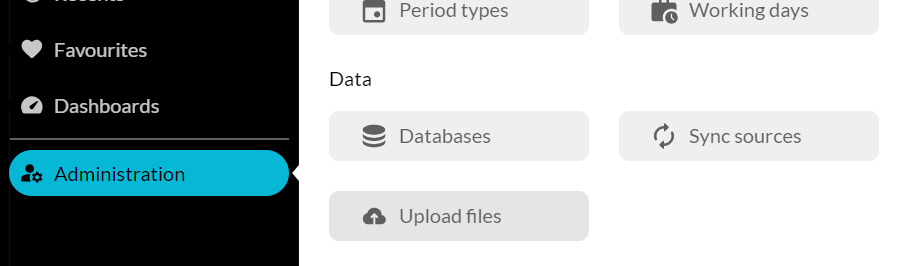
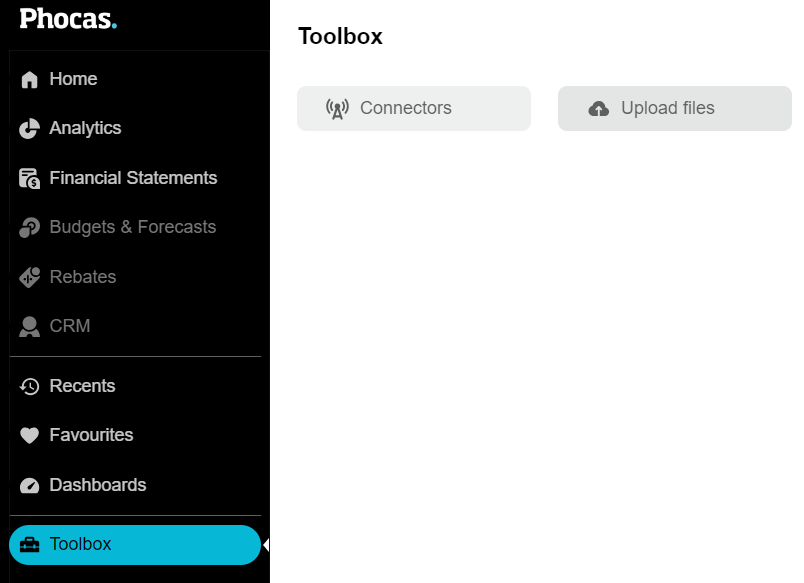
1. If you're an administrator, click **Administration** > **Upload files**; otherwise, click **Toolbox** > **Upload files**.
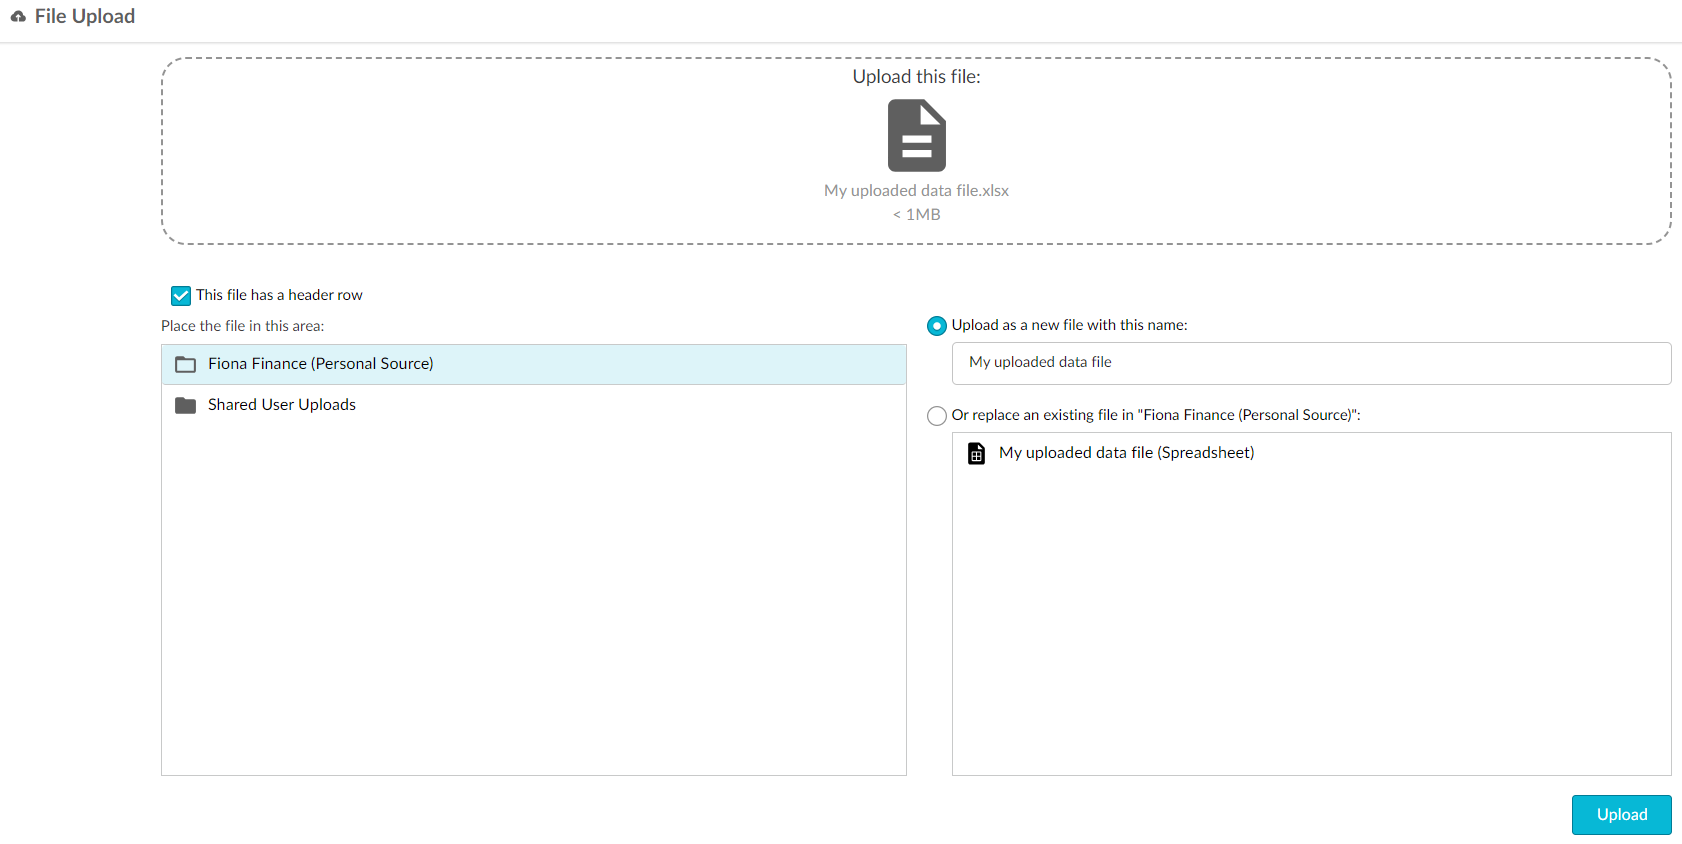
2. Locate the file on your computer, then select or drag the file into the upload area.
3. Select or clear the **This file has a header row** checkbox, as applicable. If you're uploading a budget file, you must select this checkbox to enable Designer to recognize the file as a budget file.
4. Select where you want to place the file:
* **Personal source**: This folder is only accessible to you, the signed-in user. This is a useful option if you're uploading confidential data or any data you don't want others to see.
* **Shared User Uploads**: This folder is available to all users with permission to upload files (see specific user permissions at the top of this page). You must select this option if you're uploading data you want other users to be able to access, such as a budget file.
5. Select one of these options:
* **Upload the file as a new file with this name**: Select this option if you're adding a brand new file to Phocas, then edit the file name if required, and click **Upload**.
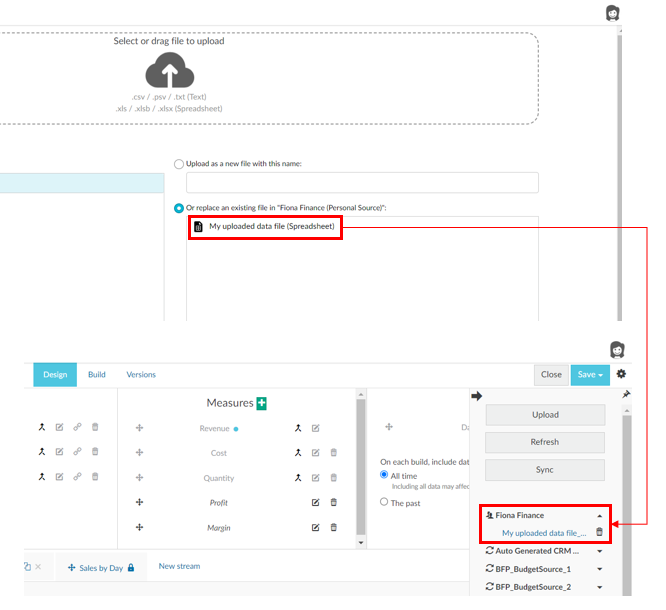
* **Replace an existing file**: Select this option if you're uploading an updated version of a file that's already in Phocas, such as a budget. Note that in the case of an XLSX file with multiple worksheets, you will replace all of those worksheets during the upload process, as you cannot select a particular worksheet to replace. Select the file you want to replace, then click **Replace**.
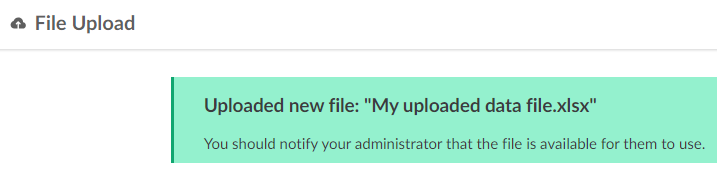
After the file is uploaded, a message displays, advising you to let your administrator know the file is available.
6. (If applicable) Contact your administrator to let them know the file is available.
7. (Administrators) In Designer, view and use the new file in a database design. It displays in the [data sources panel](/administration/designer.md#data-sources-panel) under your personal data source, labeled with your username. You can also delete the data sources from there.
---
# Agent Instructions
This documentation is published with GitBook. GitBook is the documentation platform designed so that both humans and AI agents can read, navigate, and reason over technical content effectively. Learn more at gitbook.com.
## Querying This Documentation
If you need additional information that is not directly available in this page, you can query the documentation by asking a question.
Perform an HTTP GET request on the following URL with the `ask` and `goal` query parameters:
```
GET https://docs.phocassoftware.com/basics/other-tools/upload-a-file.md?ask=&goal=
```
`ask` is the immediate question: it should be specific, self-contained, and written in natural language.
`goal` is what the user is ultimately trying to achieve, the reason they need the answer. Sharing it helps GitBook give you a better, more relevant answer. A goal is most helpful when it describes the outcome the user wants rather than restating the question. For example, with `ask=how do I create an API token`, a goal like `automate deployments from our CI pipeline` lets GitBook tailor the answer to that use case.
The response will contain a direct answer to the question and relevant excerpts and sources from the documentation.
Use this mechanism when the answer is not explicitly present in the current page, you need clarification or additional context, or you want to retrieve related documentation sections.