Set up SSO
User permission: Administration > Configuration
To learn about SSO in Phocas, see Configuration > Single sign-on settings.
This page outlines how to set up Phocas and a third-party identity provider (IdP) application to allow single sign-on (SSO) for your Phocas site.
This is an advanced technical process typically carried out by the IT person in your organization with access to the IdP. It involves moving between Phocas and the IdP application. The instructions below outline what to do on the Phocas side, as each IdP has it's own process. If Microsoft Entra ID is your IdP, see this page for specific instructions.
In the Phocas menu, click Administration > Configuration, then click the Single sign-on (SSO) tab.
Select the Allow SSO via SAML checkbox. The SAML configuration settings display.
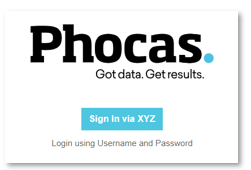
In the Identity Provider (IdP) section, enter a name for the provider, for example, My Company SSO. This will display as a button on your Phocas sign in page.
Enter the Identity Provider (IdP) information.
IdP information
You need to get this from the IdP you are using. It can be useful to have the Configuration screen and the relevant settings page from your IdP open side by side. Depending on your provider, this information might be called something different from what it is called in Phocas.
Login URL
Logout URL (optional)
Entity ID
X509 certificate: This is commonly used standard in internet protocols and, although it is not compulsory, it is strongly recommended that you copy these details from your IdP and enter them into Phocas. If you make an error when doing this, when you try to save your configuration changes, the certificate text will turn red and show an error message. Check you have copied the entire text and have not accidentally added spaces or deleted anything.

Additional information: when an IdP has a specific URL to a favorite or other resource
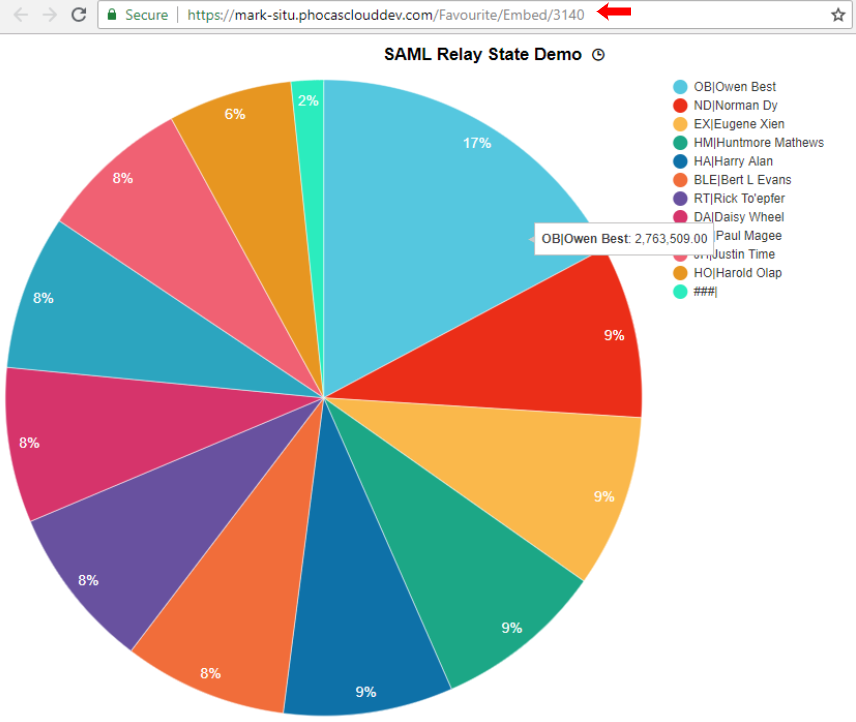
In an IdP-initiated single sign-on flow, the IdP might supply a path to a specific resource (such as an embedded favorite) in the RelayState parameter of the request. When the sign-on successfully occurs, the application automatically directs to the URL specified in the RelayState parameter.
For example, the RelayState below specifies the path '/favourite/Embed/3140' - which identifies a particular favorite in Phocas. When the user signs in successfully via a SAML request, they are automatically taken to the favorite, as shown below.

Copy the Service Provider (SP) and paste it into your IdP application.
SP information
When you enable SAML, Phocas will automatically populate the details in the Service Provider (SP) section. The service provider is the system (Phocas) that wants to use SAML to authenticate its users.
Select and copy this information and paste it into the relevant fields in your IdP application.

If you have an on-premise installation of Phocas, you are also asked for an Application URL. You’ll find this in the General tab > Defaults section of the Configuration screen.
Select the Enhanced SAML Security checkbox (recommended).
Enhanced SAML security...
The Enhanced SAML Security setting is recommended. It changes the look of the Phocas sign in screen to promote the SAML authentication method.
SAML users will only be able to sign in to Phocas using SAML.
SAML user passwords will not be resettable in Phocas.
Non-SAML users can still sign in to Phocas via the link below the Sign in button.

(Optional) Select the Update user account with details from IdP on user sign-on checkbox.
Update user accounts...
If you select the Update user account… checkbox, you activate the user details sync process. Each time a user signs in to Phocas, the details in their Phocas account are automatically synced (updated) with their IdP details. The sync works in one direction only; details are passed from the IdP to Phocas, so the IdP is the single source of truth.
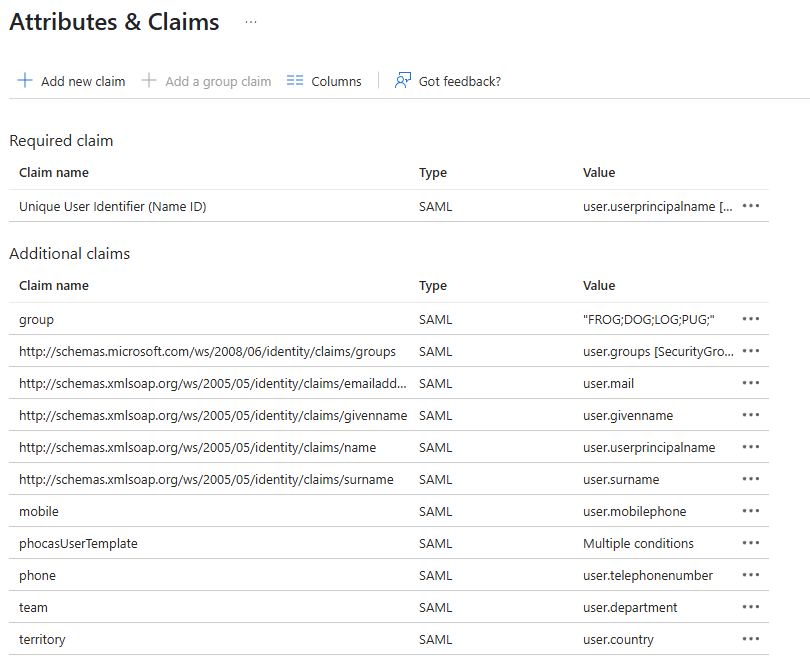
Currently, the following details are passed to Phocas from the IdP: Display Name, Given Name, Surname and Contact Email. Other special attributes (such as telephone, mobile phone, groups, territory and team) might also be passed through, depending on your IdP setup. Here is an example of where IdP (Azure AD) attributes are mapped to the special Phocas attributes.

Users can still edit their details in Phocas (via user account settings) but the next time they sign in to Phocas, those details will be overwritten with whatever is in the IdP. If users need to update their details, they should get their IdP administrator to update them, then they will flow through to Phocas.
(Optional) Select the Automatically create user account if none exists checkbox, then select a template, if required.
User account creation and templates...
The User account creation feature applies to IdP-authorized users who do NOT currently have a Phocas account. If you enable this feature, when such a user tries to sign in to Phocas using SAML, a Phocas account will be automatically created for them.
Templates are available if you have created them for your site. If you select a template, the user’s Phocas account is based on that template. If you do not select a template, the user gets the default Phocas account, which has a Viewer license and Viewer permissions (limited data access). You can update the user account later.
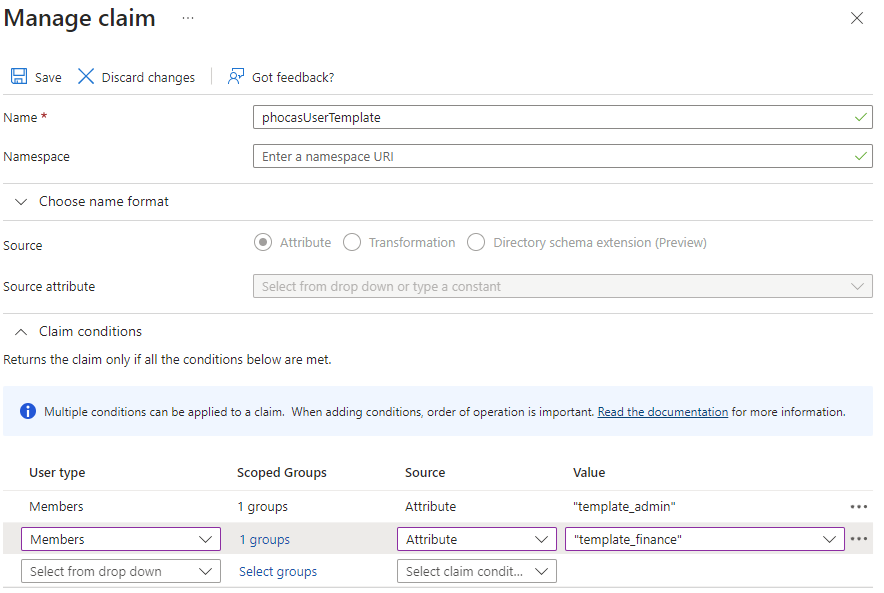
If you create multiple templates in Phocas, you can set up your IdP to determine which of those templates is used when each new user account is automatically created in Phocas. For example, if an IdP authorized user is part of an administrator group, you can select the corresponding template for that group (one with administration permissions). Phocas will use that template instead of the default template when creating an account for that user.
Any details from the IdP passed along on sign in will overwrite the equivalent details of the template. For example, if a template has its Groups set to Group 1 but the IdP passes Group 2, the resulting newly created user will be set to Group 2.
Here is an example of where IdP (Azure AD) is set up to use templates. The phocasUserTemplate is the one that drives the default template for the user. Note how the group membership is used to select which template should be used.

Click Save.
Last updated
