Configuration
Configure and customize your Phocas site's general, connection, and SSO settings.
User permission: Administration > Configuration
The Configuration page contains several settings organized into three tabs. Ensure you click Save to apply your changes to the settings on this page.
General settings
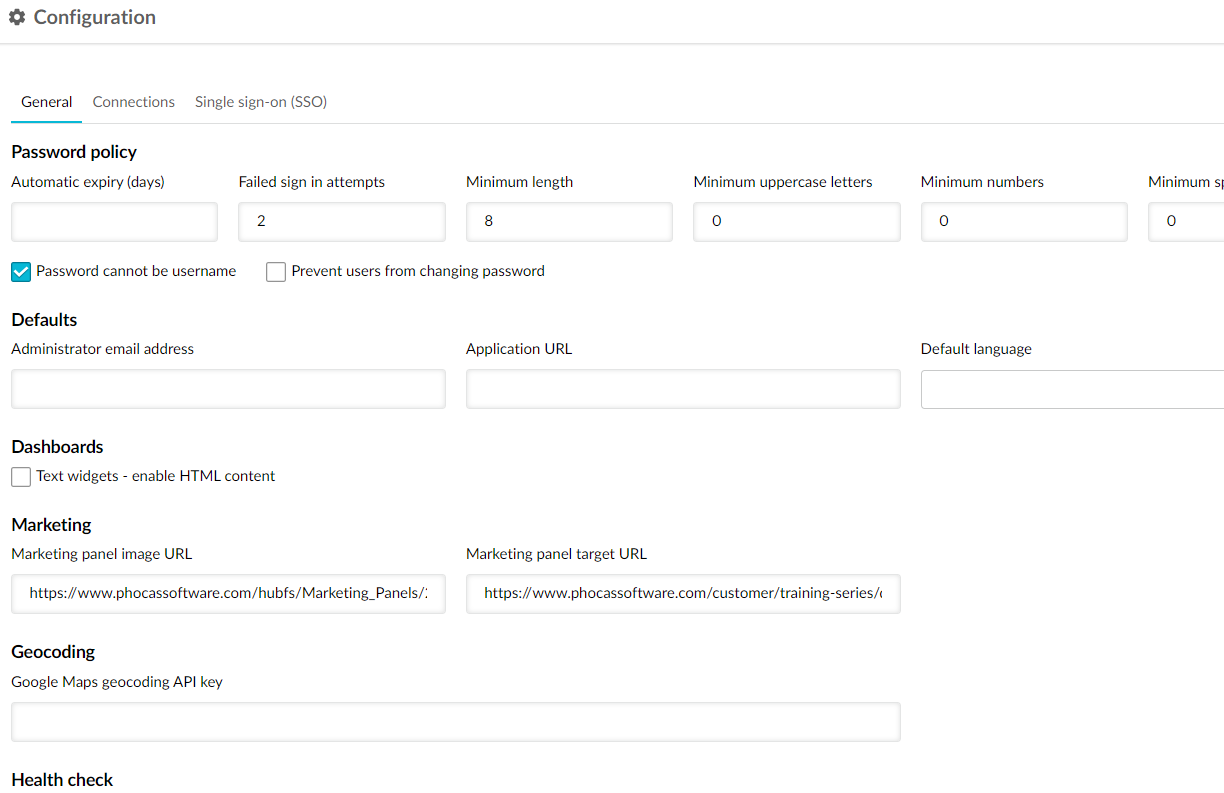
On the General tab, you can set your password policy, date format, language, and more.
Password policy
If your site uses Phocas authentication (default), users and hashed passwords are stored in the Phocas system and you can set a site-wide password policy that includes automatic expiry, length, character requirements, and so on.
The Phocas-managed password policy does not apply if you are another way to authenticate Phocas users:
LDAP (Lightweight Directory Access Protocol): This authentication method can be configured during installation. User passwords take on AD (active directory) protocols.
SSO (single sign-on): This authentication method uses a trusted third-party identity provider (IdP) to allow users to sign in to Phocas with the same credentials they use for other applications.
Set your required password policy...
Automatic expiry (days): The number of days a user’s password will remain valid before it expires, forcing the user to reset their password when they next attempt to sign in. An administrator can also reset passwords. Select the duration from the dropdown list.
Failed sign in attempts: The number of times a user can try to sign in to Phocas before they are locked out of their account. By default, this is two attempts. If this setting is left blank or set to 0, there’ll be no limit to the number of times a user can try to sign in. LDAP accounts are not subject to lockout. See how to unlock a user's account.
Minimum length: The minimum length of a password. By default, this is 8 characters.
Minimum uppercase letters, numbers, and special characters: The minimum number of uppercase letters, numeric characters, and/or special characters that users must have in their passwords. By default, these are all 0.
Password cannot be username: This checkbox is selected by default, which means that users can’t include their username in their passwords. Clear this checkbox if you want to allow users to include their usernames in their passwords (not recommended).
Prevent users from changing password: Select this checkbox to prevent users from changing their own password. If checked, non-administrators will not be able to change their password.
See Manage user passwords for information on managing user passwords;
Defaults
Administrator email address
This is the email address of the Phocas administrator for your site. On sites without the forgotten password functionality, this email address is provided so users can contact the Phocas administrator.
Application URL
This is the web address where users connect to your site. When users are first added to Phocas, they receive this URL in an email. In some older versions of Phocas, this setting might say External URL.
Default language
This setting controls the language used across your site. It affects the user interface (UI), number formatting, and date formatting. See the Account settings page for general information about the language settings in Phocas and their impacts.
Each user can override the selected language by choosing a different language on their Account settings page.
You can also set a language for a specific user on the User tab of their account page in the Administration module.
Dashboards
The Text Widgets - Enable HTML Content (potentially unsafe) setting controls whether or not text widgets are allowed on your site. By default, the checkbox isn’t selected, which means that text widgets aren’t allowed. Selecting the checkbox will allow users to add potentially unsafe HTML content to a dashboard via a text widget, which might make your site vulnerable.
Marketing
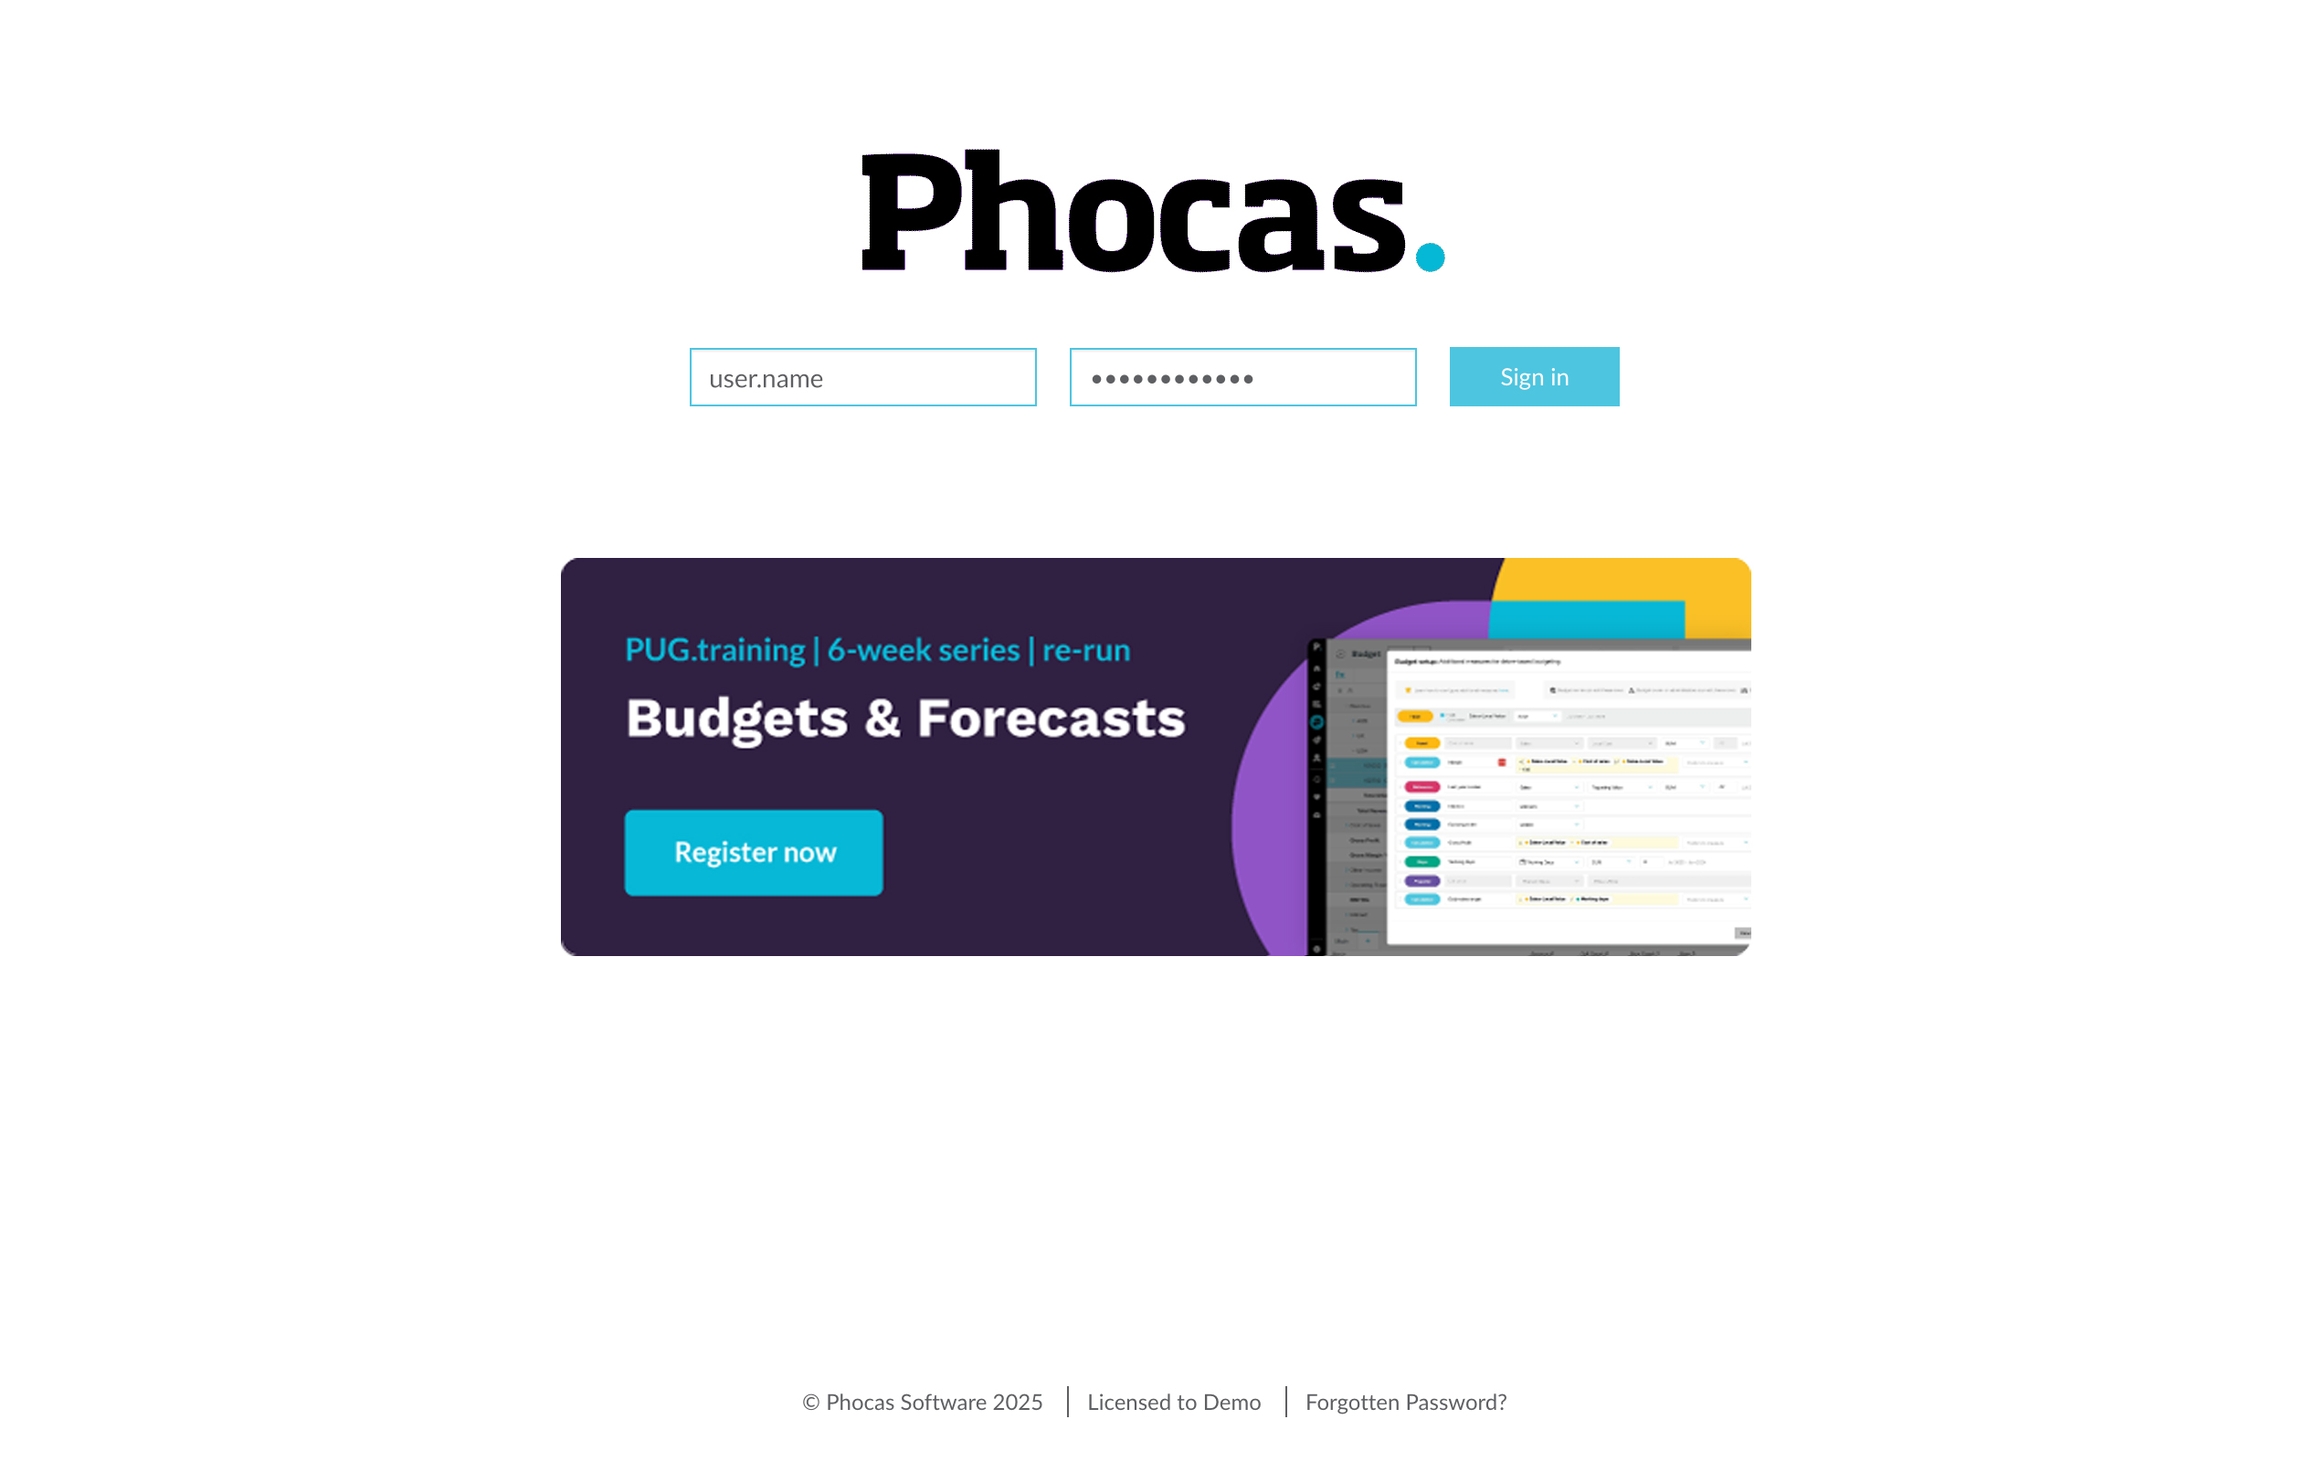
You can add a marketing panel to the Phocas sign-in screen, in the form of a small linked image which redirects the user to another web page. This is sometimes used by Phocas to provide training information and notice of upcoming events to users.
Marketing panel image URL: The full path name of the image to be displayed. It is recommended that these are 650 x 217 PX and in the PNG format.
Marketing panel target URL: The web address to redirect to if the panel is clicked.
Geocoding
This is your Google Maps geocoding API key, which is required for map charts.
Health Check
The Send health check setting controls whether or not a health check report is sent to Phocas. By default, the checkbox is selected, meaning the report is sent. Clear the checkbox if you don't want to send the reports.
CRM
Applicable to the CRM module, these settings add links in CRM entity pages that provide shortcuts to either a Query database and/or a dashboard with that entity focused. For example, open the Sales database with XYZ customer selected.
Connections settings
On the Connections tab, you can configure and test the LDAP and SMTP settings.
LDAP
Phocas authentication is the default security model, with users and hashed passwords stored in the Phocas system. However, you can configure LDAP (Lightweight Directory Access Protocol) authentication as the user authentication mechanism. This method only authenticates a user's username and password; permissions are stored in Phocas.
Configure the LDAP
The following configuration options are available in the LDAP window:
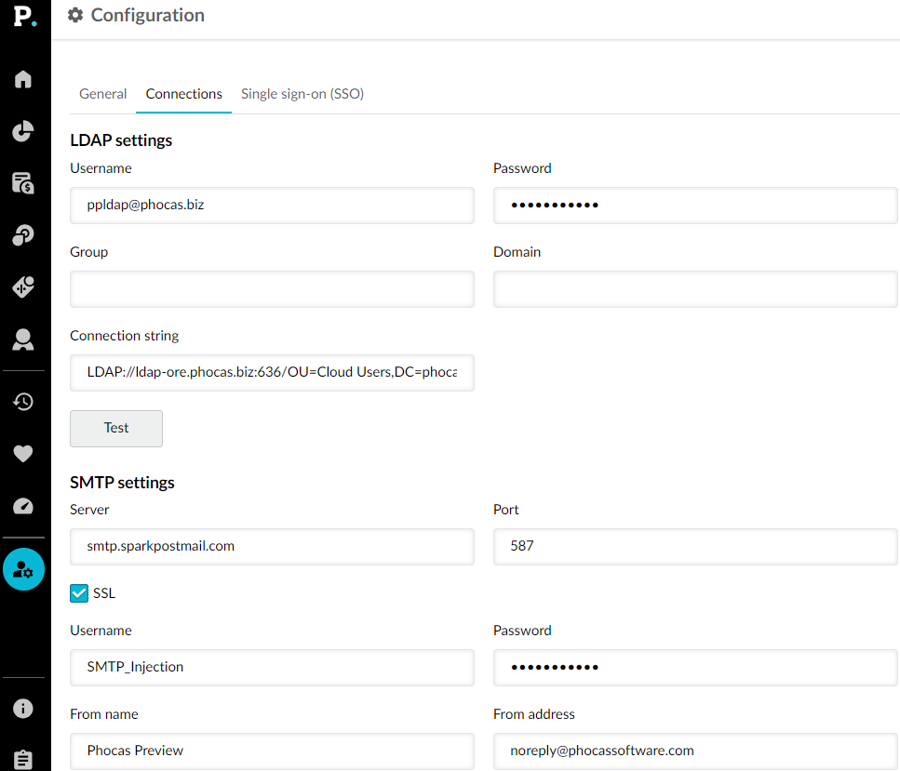
Username and Password: Username and password to connect to the LDAP server.
Group: LDAP users can be members of one or more LDAP Groups. Notes about groups:
A group name can be entered to limit the number of LDAP usernames retrieved.
Alternatively, a valid LDAP filter can be entered, beginning with a left bracket ‘(‘.
If an LDAP filter is not entered, the following filter will automatically be applied to limit the number of usernames retrieved: (objectClass=user)(objectCategory=person).
Groups can be used with or without LDAP organizational units (OUs).
Domain: Should be left blank, as it is added to LDAP usernames at login.
Connection string: String to store the server, port, domain and, where required, the organization unit where the users are stored. To create the LDAP URL, you need to know the server, port, domain and possibly the organization unit, where:
The server is usually the Active Directory (AD) server.
The default LDAP port is 636.
The domain is split by the period and added as DC elements. Larger companies might split users into organization units (where the users are stored), however, not including the OU should allow any user of the domain to authenticate.
More notes about connection strings:
The LDAP, OU and DC must be capitalized.
Syntax: LDAP://[server]:[port]/OU=[organisation unit],DC=[domain],DC=[domain]
Examples: LDAP://ldap.phocas.com.au:636/DC=phocas,DC=com,DC=au LDAP://dc.company.com:587/OU=users,DC=company,DC=com LDAP://HostName[:PortNumber]/CN=Smith,Jeff,CN=users,DC=fabrikam,DC=com
See a detailed explanation of the LDAP URL (this link will take you to an external site).
See a brief explanation of the LDAP URL (this link will take you to an external site).
Test the LDAP configuration
Click the Test button below the settings to test the current LDAP configuration. If the connection is successful, a list of retrieved usernames displays. If the connection is unsuccessful, a Connection Failed message displays, with an explanation of the problem.
Deal with server changes
From time to time, server changes might affect LDAP access. This can easily be addressed by updating IP addresses in your firewall, which can be obtained from your Phocas Support Team.
Combine LDAP and non-LDAP users
When LDAP is enabled, all new users are assumed to be LDAP accounts, but the system does allow a mixed approach.
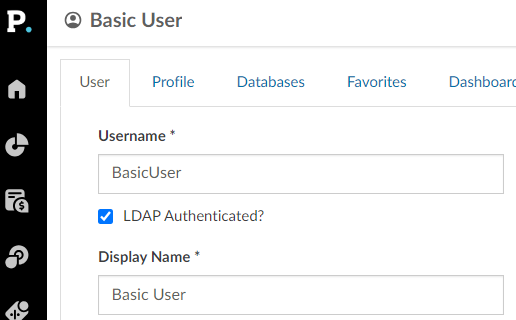
On the user account page > User tab, there is a checkbox under the Username box, which is selected for new users by default. If you clear this checkbox, the user will be authenticated by Phocas instead.
SMTP
You can configure the Simple Mail Transfer Protocol (SMTP) settings to enable Phocas to send emails, thus allowing users to subscribe to a favorite and export data to an email.
Configure the SMTP
The following configuration options are available in the SMTP window:
Server and Port: Server and port to connect to the SMTP server.
SSL: Selected by default, this setting enforces a secure connection with the SMTP server.
Username and Password: Username and password to connect to the SMTP server.
From name: String value that is displayed as the sender of emails, replacing the email address. If left blank, it will default to Phocas (No Reply). Some SMTP servers (such as Gmail and Hotmail) do not allow you to change the From name setting to anything other than your account, and any address you enter will be overwritten before the servers relay the email. This is to prevent spamming/spoofing.
From address: Email address that replaces the email address associated with the username (if allowed by the mail server). Most email servers ignore this field. If left blank, and the username contains an @, Phocas will set the reply address to no_reply and the domain abstracted from the username (everything before the @).
Test the SMTP configuration
Click the Test button below the settings to test the current SMTP configuration. You can enter a test email address to which a test email will be sent. A notification will show a pass or fail message. Errors are logged if troubleshooting is required.
Single sign-on settings
On the Single sign-on (SS0) tab, you can set up SSO for your Phocas site. The SSO feature uses a trusted third-party identity provider (IdP) to allow users to sign in to Phocas with the same credentials they use for other applications, such as Microsoft Entra ID and OKTA. SSO uses a standard web protocol known as Security Assertion Markup Language (SAML), which securely passes a user’s identity from one place (IdP) to another (Phocas) via encrypted, digitally signed, XML certificates.
SSO for enhanced security
While Phocas doesn’t natively support multi-factor authentication (MFA), if you’re looking for that level of security, use SSO for your Phocas site. You can either give users the option of signing in with their IdP credentials or make it mandatory for them to do so (see the Enhanced SAML Security setting).
How SSO works
When you allow SSO for your Phocas site, users will see a Sign in… button on the Phocas Sign in screen, allowing them to sign in via the IdP. If you select the enhanced SAML security setting in your SSO configuration, users will only be able to sign in with the IdP.
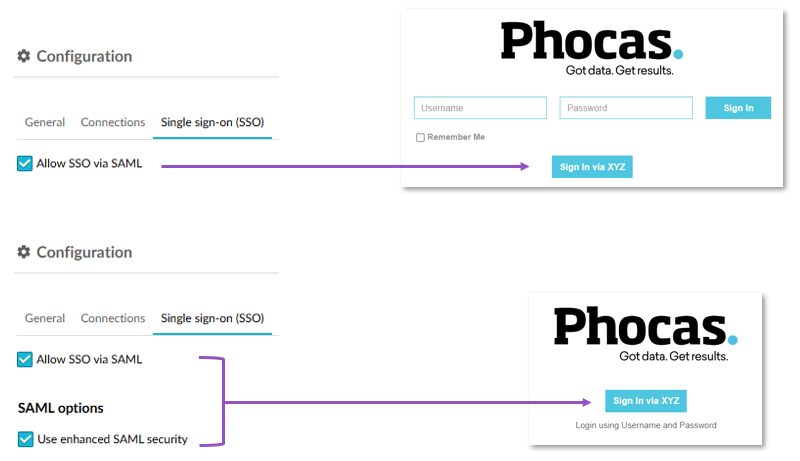
When users sign in using SSO, if they're already authenticated with your IdP, they're taken straight into Phocas. If they are not yet authenticated, they're taken to a second sign in screen, where they enter their credentials for the IdP.
When users finish their session in Phocas, they need to sign out of Phocas in the usual way, even if they have signed out of other applications that use the IdP. Without signing out, the duration of a session will depend on your IdP and other factors, such as how often the users clear cookies.
Setting up SSO
If you're using Microsoft Entra ID as your IdP provider, go to the Set up SSO with Microsoft Entra ID page. Otherwise, go to Set up SSO (generic IdP).
Last updated
