Customize a financial statement
Customize the layout and contents of a financial statement to meet your organization’s needs by adding and removing items and changing the order in which they display.
User permission: Manage Custom Statements
Rather than customize the default financial statements that come from your database, it's better to clone those statements and then customize the cloned versions. This ensures you always have the default financial statements as a baseline.
Statement setup window
You carry out your customization in the setup window of a financial statement.
In the Statements menu, click the name of a financial statement to open its statement setup window.
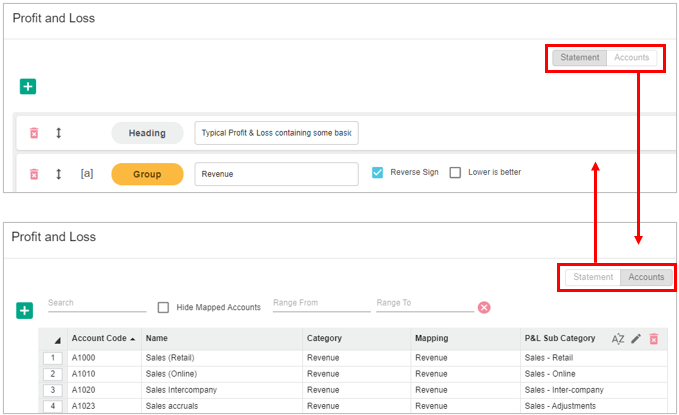
The statement setup window has two tabs, the Statement tab (opens by default) and the Accounts tab, as outlined below.

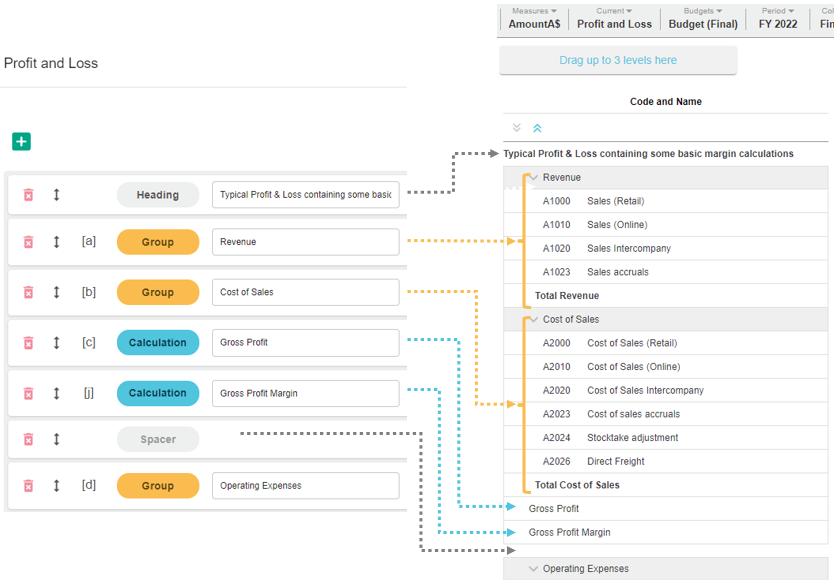
The Statement tab displays the financial statement name in the top left corner and has several rows underneath, which correspond to the top-level items in the financial statement, in the order in which they display.
Depending on the statement, you might see the following items:
Group - Used to group accounts into categories in the financial statement. Common groups (categories) are Revenue, Expenses, Current Assets and so on.
Calculation - Used for determining a value in the financial statement, such as Gross Profit, EBITDA, Total Assets and so on.
Spacer - Used for inserting white space between items in the financial statement.
Heading - Used for inserting headings in the financial statement. For example, you might want to add a descriptive heading to display underneath the financial statement name.
Balance - Available in Cash Flow statements only. There are two Balance rows, one each for the cash at the start and end of the period.
A reference in a bracket [] displays on each group, calculation and balance row. These references are used in calculations.

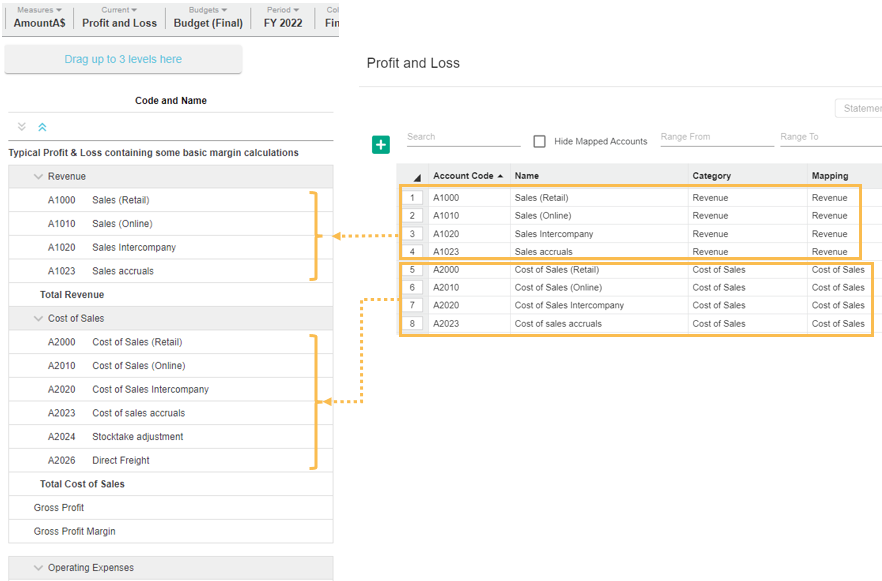
The Accounts tab displays your chart of accounts. You can scroll down the list to see all the accounts or search by code, name or other property.
The Mapping column displays the category (group in the Statements tab) each account is mapped to. If no mapping has occurred, the Mapping column will have no content. See Map accounts to a group.

Customization options
You can take the following actions:
Example: Customize a Profit & Loss statement
The following brief example shows how you can customize several elements in a Profit & Loss statement to create the statement that best suits your needs.
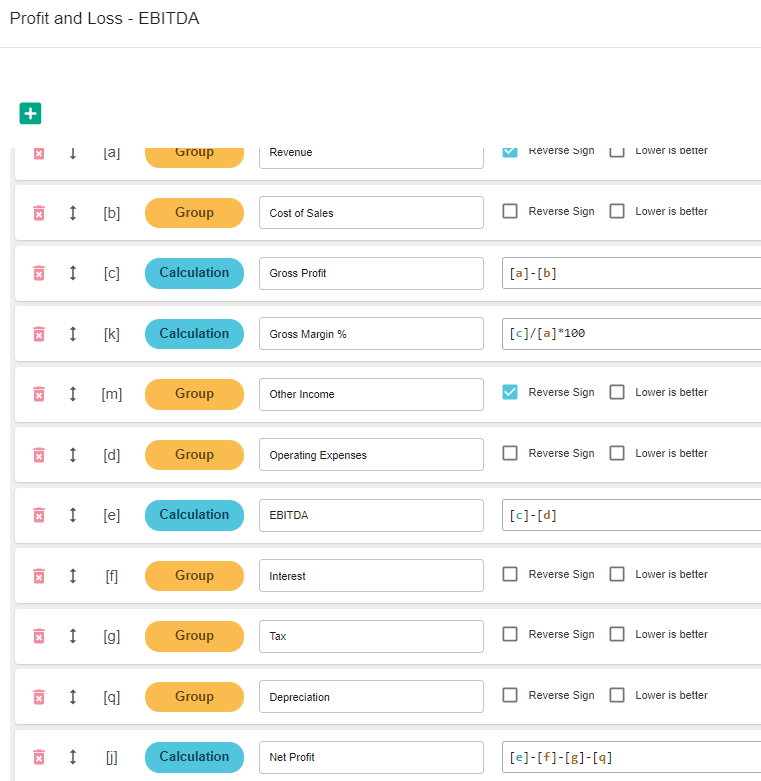
Suppose you want to view the earnings before interest, taxation and depreciation (EBITDA) in the Profit and Loss statement. You first need to add new groups to split out the interest, taxation, and depreciation expenses from the operating expenses and map the applicable accounts to those new groups. Next, you add a new calculation to determine the EBITDA value. You then need to move the new group and calculation to the position you want them display in the statement. As a result of adding the new group and calculation, you need to edit the existing Net Profit calculation.
The key steps are as follows. See the related pages (links in section above) for more detailed information.
In the Statements window, click the Profit and Loss statement in which you want to add the EBITDA row.
In the statement setup window, add three groups, one for Interest, another for Taxation and the other for Depreciation.
Drag the new groups up to sit below the Operating Expenses group, then click Save.
Click the Accounts tab, map the applicable accounts to the new groups, then click Save.
Back in the Statements window, click the Profit and Loss statement again.
In the statement setup window, add a calculation for the EBITDA value. The formula is Gross Profit minus Operating Expenses.
Drag the new calculation up to sit below the Operating Expenses group, above the three new groups.
Edit the Net Profit calculation box to reflect the changes you made. The formula is now EBITDA plus any other revenue, minus the Interest, Taxation and Depreciation, minus any other expenses.
Click Save > Close > Close > Yes to rebuild the database.

Last updated
