Focus on data
Use the Focus tool to filter the dataset and take your analysis further, concentrating on specific rows of data.
User permission: Query > Focus and Reset
The Focus tool helps you narrow down a dataset to only the rows you care about, allowing deeper, more targeted analysis by hiding everything else. It's perfect for isolating top-performing items, specific customer segments, or just cleaning up your grid view.
Focus to filter data
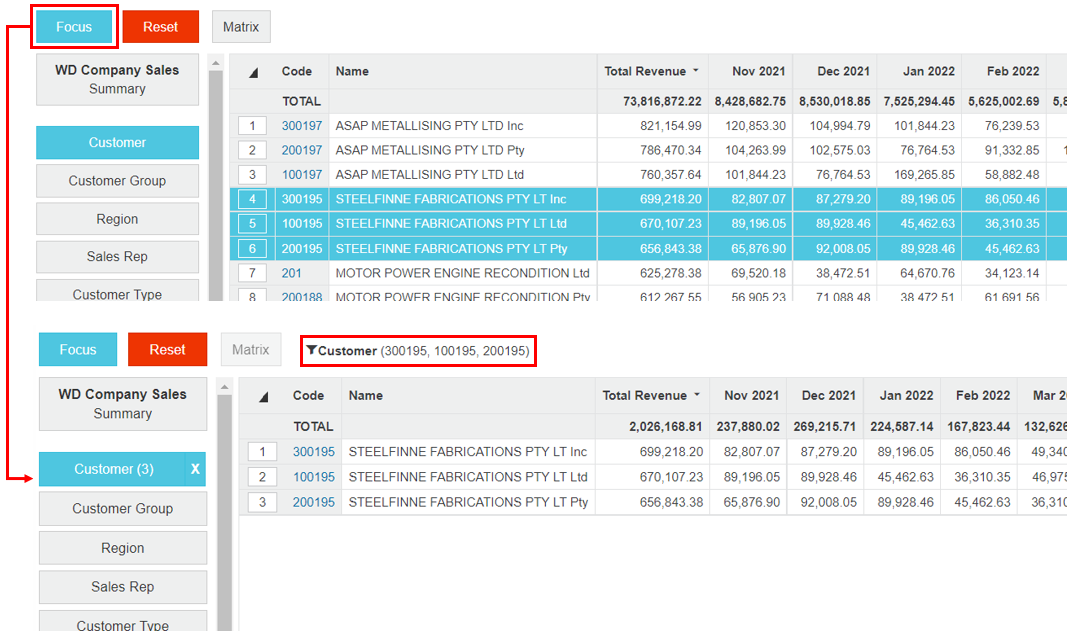
Click a dimension, select the row(s) you want to focus on, then click the Focus button.
The grid updates to display only your selected rows. Any totals or averages that display in the updated grid now relate only to the selected rows of data. The status bar above the grid identifies the selected data. The number of rows you have focused on displays in brackets on the corresponding dimension (which displays in blue).

Exclude data
Rather than selecting rows to focus on, you can select rows to omit (remove) from the grid, allowing you to focus on the remaining rows. This feature is essentially a type of focus action that uses a not equal to selection.
You might want to exclude rows of data that you are not interested in or are not relevant to your analysis questions. For example, suppose you are analyzing your customer sales for the last three months. Only four customers generated revenue above the target, so you want to take your analysis further, without those top-performing customers in the picture.
Select the rows you want to exclude, then right-click the selection and click Exclude Selections.
The grid updates and excludes the selected rows. An exclamation mark along with the number of excluded rows displays on the corresponding dimension button and the status bar.

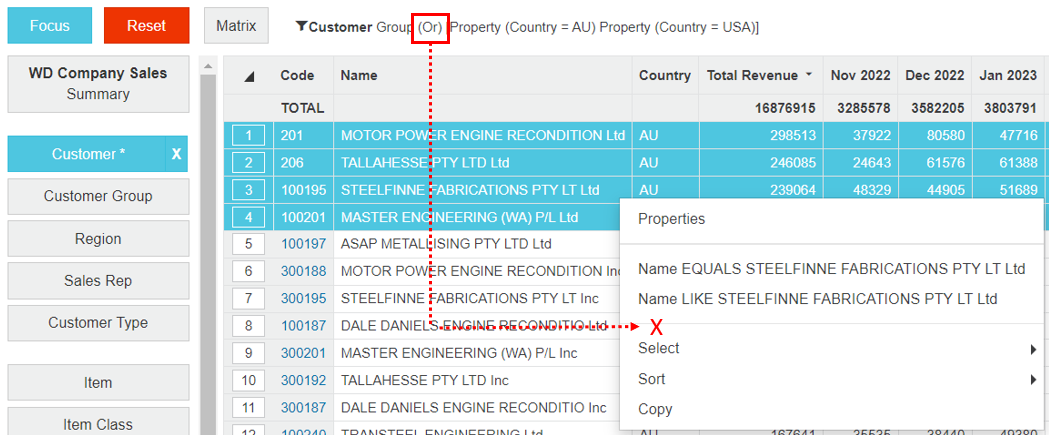
The Exclude Selections option is NOT available when using one or more OR conditions in an advanced search, as illustrated in the image below.

Lock selections
User permission: Query > Lock Selection
When you focus on data, you can lock that selection of data, so you can make further selections and clear or reset the data without affecting the original selections.
You might want to use this feature to:
Data security reasons - Locking selections allows you to restrict what other people see on your screen. If you plan on sharing the data with colleagues or non-Phocas users, such as customers and suppliers, you can lock selections to create a base selection, regardless of the reset or clear actions, allowing you to show your screen to a third party without the risk of accidentally showing restricted content.
Save time during ad hoc analysis - If, for example, you intend to spend the next 20 minutes analyzing a random group of customers, it is useful to lock selections, so you don't need to keep selecting and focusing on those customers after each reset.
The Lock Selections feature only applies to your current session. If you sign out and sign back in, the locked selections will be lost. However, if you save a favorite, your locked selections are also saved.
Apply a lock
Select and focus on the rows you want to lock.
Click the Lock Selection button on the toolbar. This button turns orange to indicate a lock is active. This button is disabled if the grid has no selections or no lock selections exist.
Continue with your analysis.

Clear a lock
Return to the dimension that contains the lock selections.
Click the Lock Selection button on the toolbar. All data will appear and the button will change back to gray.
Lock selections after an advanced search
If you lock selections when an advanced search is active, you remove the advanced search rules and lock the search results. For example, suppose you perform an advanced search for all customers above $100,000 and it returns three results. If you lock selections button, the three customers will be locked.
Remove a filter
When you apply a filter to a dimension (focus on or exclude data), the number of selected rows is displayed on the dimension button. To remove the filter and see all the dimension's entities (rows) in the grid again, click the X on the dimension button.
To completely reset the data, click the Reset button.
To retain your row selections when you revert to the full list of rows, click the Select button in the top-left corner of the grid. Your selections might not always display on the screen; they might be listed on another page of the grid. You can move through the pages to find them.
Last updated
